Configuring Zoiper with a SIP account
Zoiper is one of the world's most popular softphones, allowing you to make high-quality voice and video calls over the internet. Using VoIP (SIP) technology, the app turns your computer or phone into a professional communication tool, ideal for both remote work and home use.
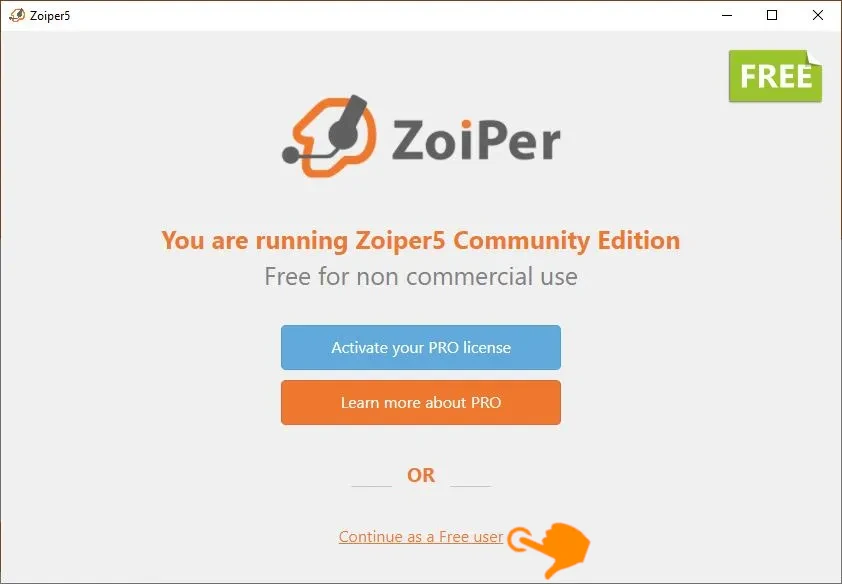
Selecting a software version
When you launch the app, you'll see the welcome screen. If you don't have a paid license, select the option at the very bottom:
- Click "Continue as a Free User."
Login credentials
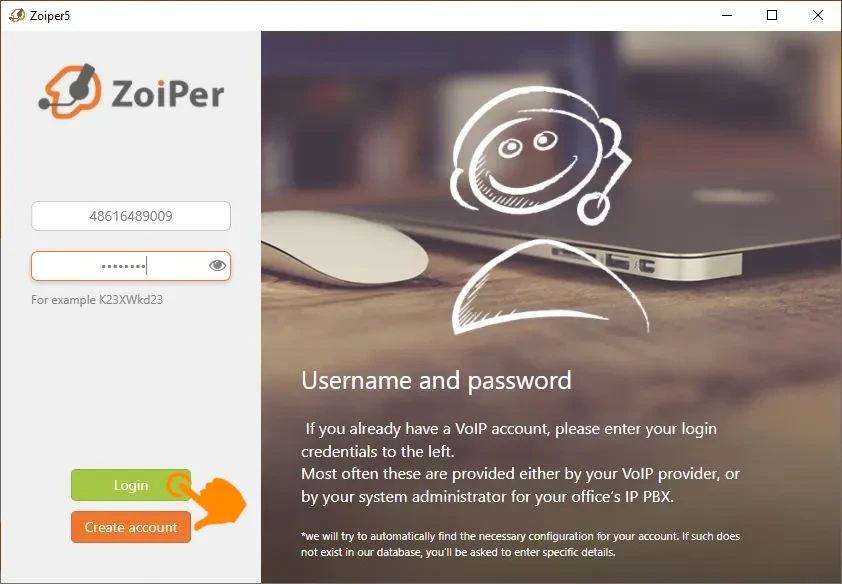
In this window, you need to enter the basic information provided by your VoIP provider:
- Username: Enter your user ID (for example: 48616489009).
- Password: Enter the password for your SIP account.
- Click the Login button.
Server address (Hostname)
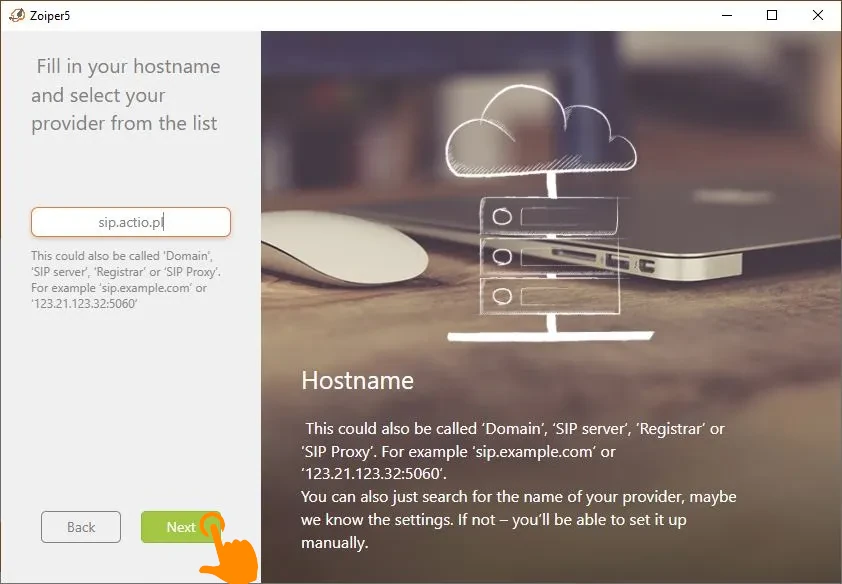
Now you need to tell the app which server to connect to:
- In the text field, enter the server address (Hostname/Domain): sip.actio.pl.
- Click the Next button.
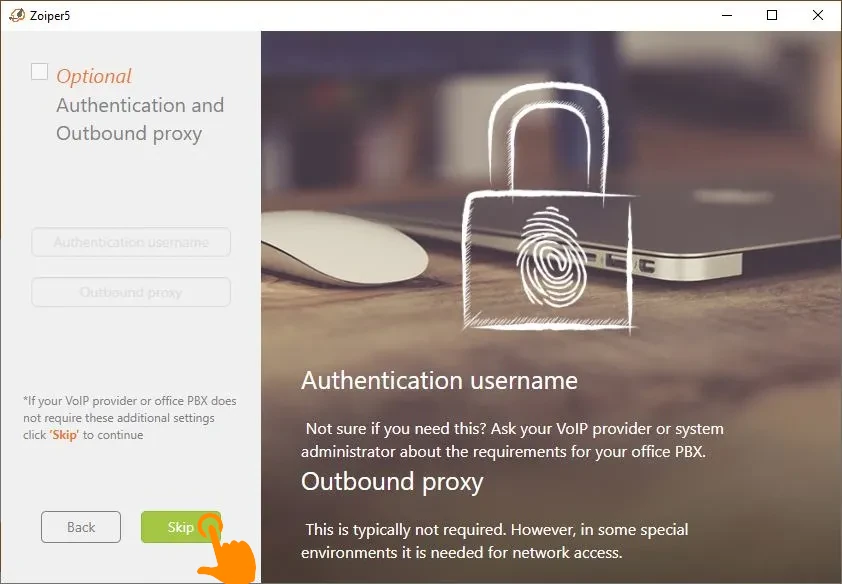
Optional authorization settings
In most standard configurations, this step is skipped.
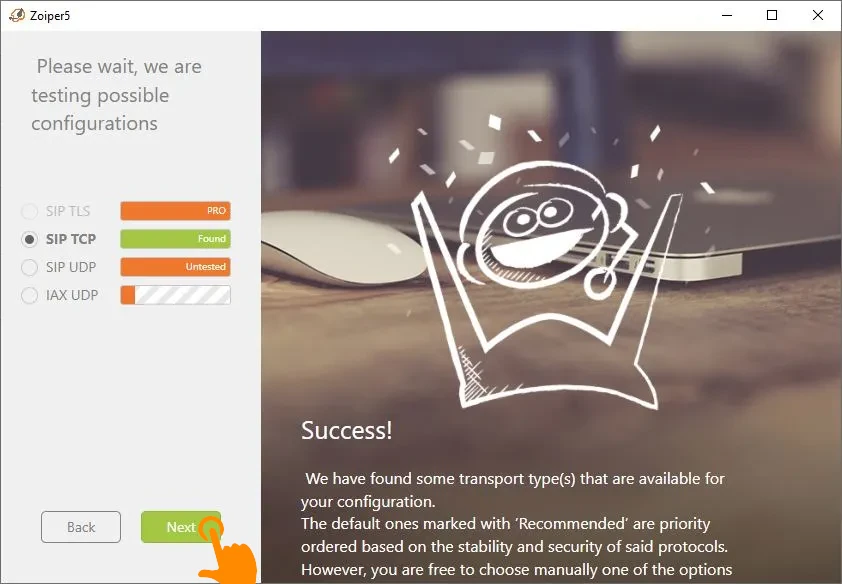
Testing the configuration
Zoiper will automatically check the available transport types (protocols).
- Please wait while the application tests the options.
- Once the system finds a valid protocol (such as SIP TCP/UDP, highlighted in green), click the Next button.
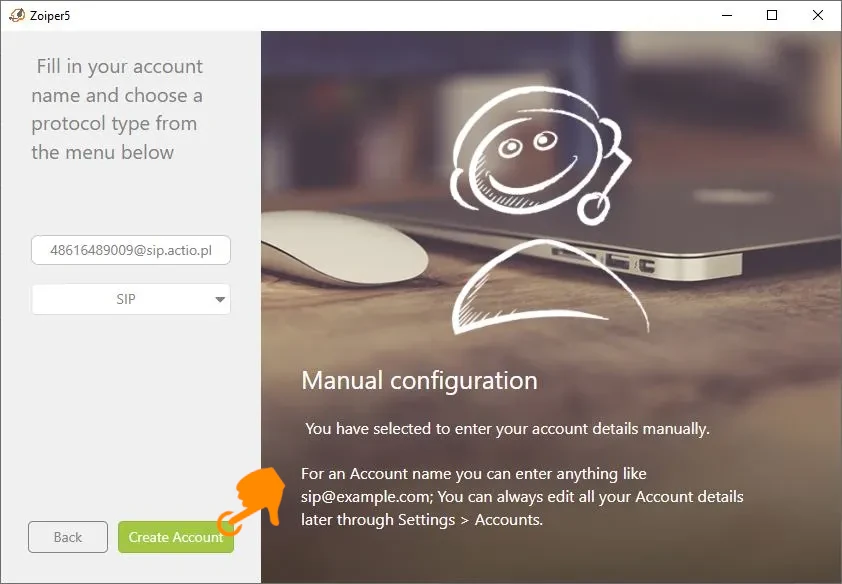
Finalization and account name
This is the final step of the manual setup:
- Make sure you have entered the correct number and server address.
- Make sure the selected protocol is SIP.
- Click Create Account.
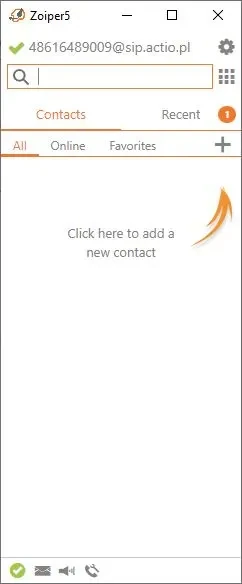
Connection verification
If everything went well, you will be taken to the app's main window:
- A green checkmark (ready icon) should appear next to your username at the top.
- Now you can start adding contacts or use the dial pad (the icon to the right of the search bar) to make calls.
Need help setting up your SIP account?
Our Polish-based support team will help you get connected. Reach out and we'll guide you through the configuration step by step.