Configuring Linphone with a SIP account
Follow these five steps to set up the Linphone app with a third-party SIP account from your VoIP provider. The example below uses ACTIO's details, but the same fields apply to any operator.
Selecting an account type
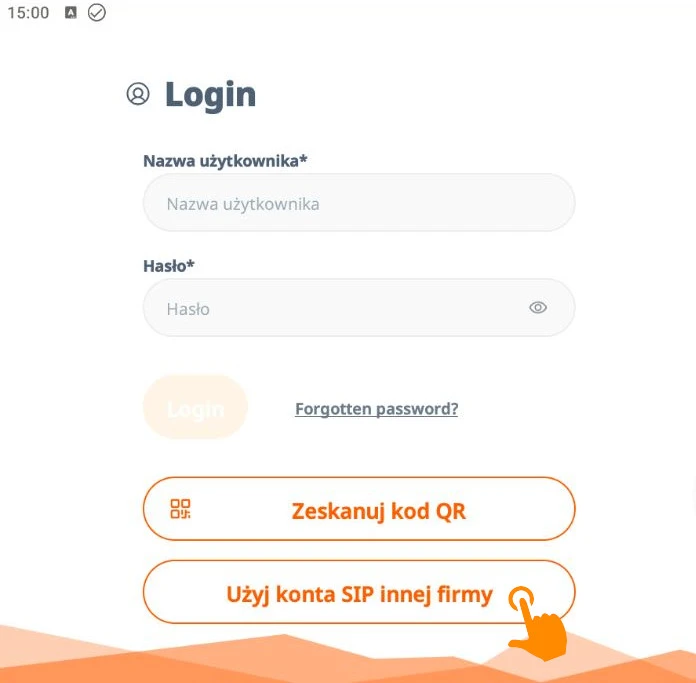
After launching the app, go to the login screen. Do not enter any information in the top fields; instead, select the option at the bottom:
- Click the "Use a third-party SIP account" button.
Acceptance of the Terms and Conditions
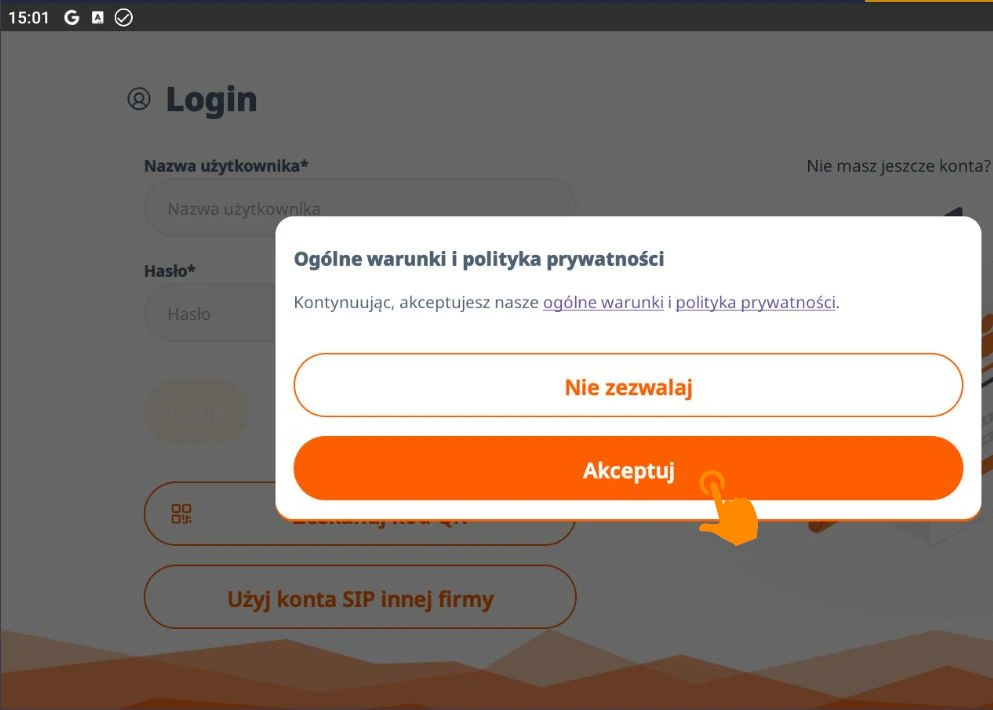
A window will appear displaying the terms and conditions and privacy policy.
- To continue, click the orange "Accept" button.
Information about additional features
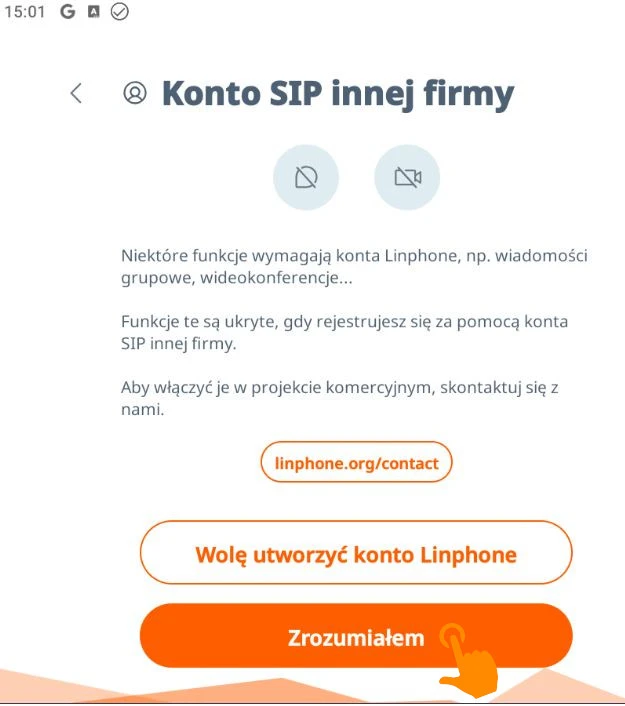
The app will display a message stating that certain features (such as video conferencing) are reserved for the app developer's native accounts.
- Read the message and click "I Understand" to proceed to the appropriate setup.
Entering operator information
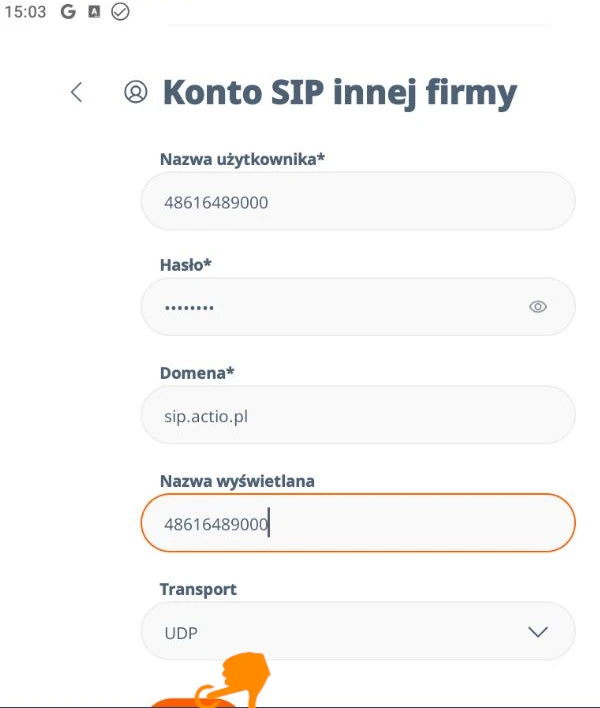
This is the most important step. Fill in the fields using the information provided by your VoIP provider (the example shows ACTIO's details):
| Field | What to enter? | Example from the image |
|---|---|---|
| Username | Your SIP number including the 48 prefix | 48616489000 |
| Password | Your personal SIP account password | ******** |
| Domain | Operator's server address | sip.actio.pl |
| Display name | Any name (e.g., a first name or a number) | 48616489000 |
| Transport | Data transfer protocol | UDP |
Finalization and verification
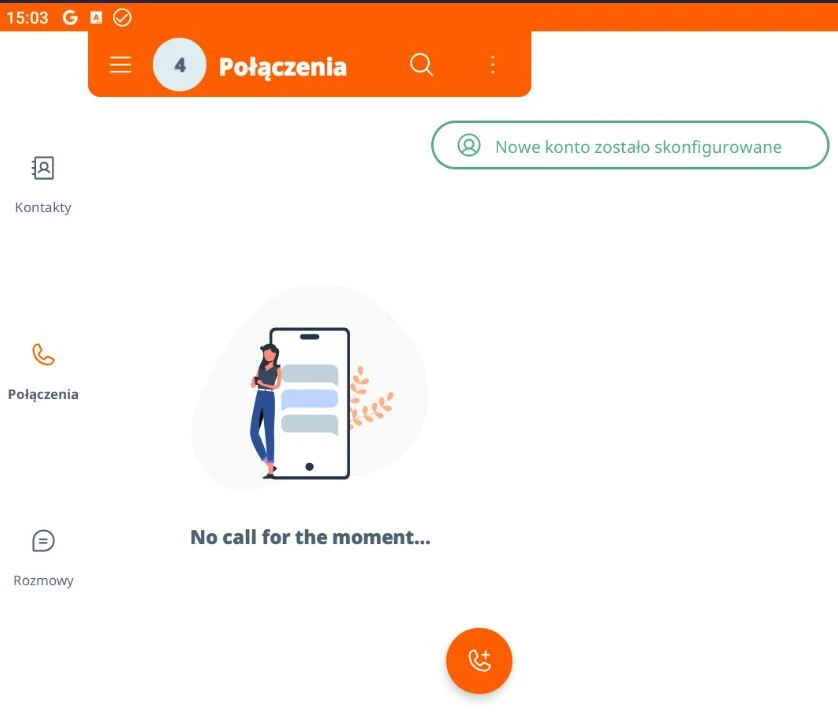
Once the information has been confirmed, the app will return to the home screen.
- A green message should appear at the top of the screen: "New account has been set up."
- In the Calls tab, you'll see that you're ready to make calls.
Important note: If you are unable to make calls despite the correct configuration, make sure you have a stable internet connection (Wi-Fi or LTE/5G).
Need help setting up your SIP account?
Our Polish-based support team will help you get connected. Reach out and we'll guide you through the configuration.